I’ve hung curtain rods on drywall, concrete, gypsum board, and bathroom tile, and the single biggest reason installations go wrong isn’t a lack of DIY skill. It’s people using a drywall process on a concrete wall, or guessing the height instead of measuring it.
First of all, get the wall type, height, and width right before you touch a drill, and the rest of the job takes less than an hour.
Mount the rod 4 to 6 inches above the window frame (higher for a taller-room effect), extend the brackets 4 to 10 inches beyond the frame on each side, mark and level before drilling, and match your anchor to your wall type. Concrete and gypsum, the two most common wall types in Dubai homes, need different anchors than the drywall most generic guides assume you have. I’ll walk through both below, along with bathroom rods, no-drill options, and what professional installation actually costs here.
What Tools Do I Need to Install a Curtain Rod?
I never start a job without laying every tool out first, because stopping halfway through to search for a drill bit is how brackets end up crooked. Here’s what I bring to every job, DIY or professional:
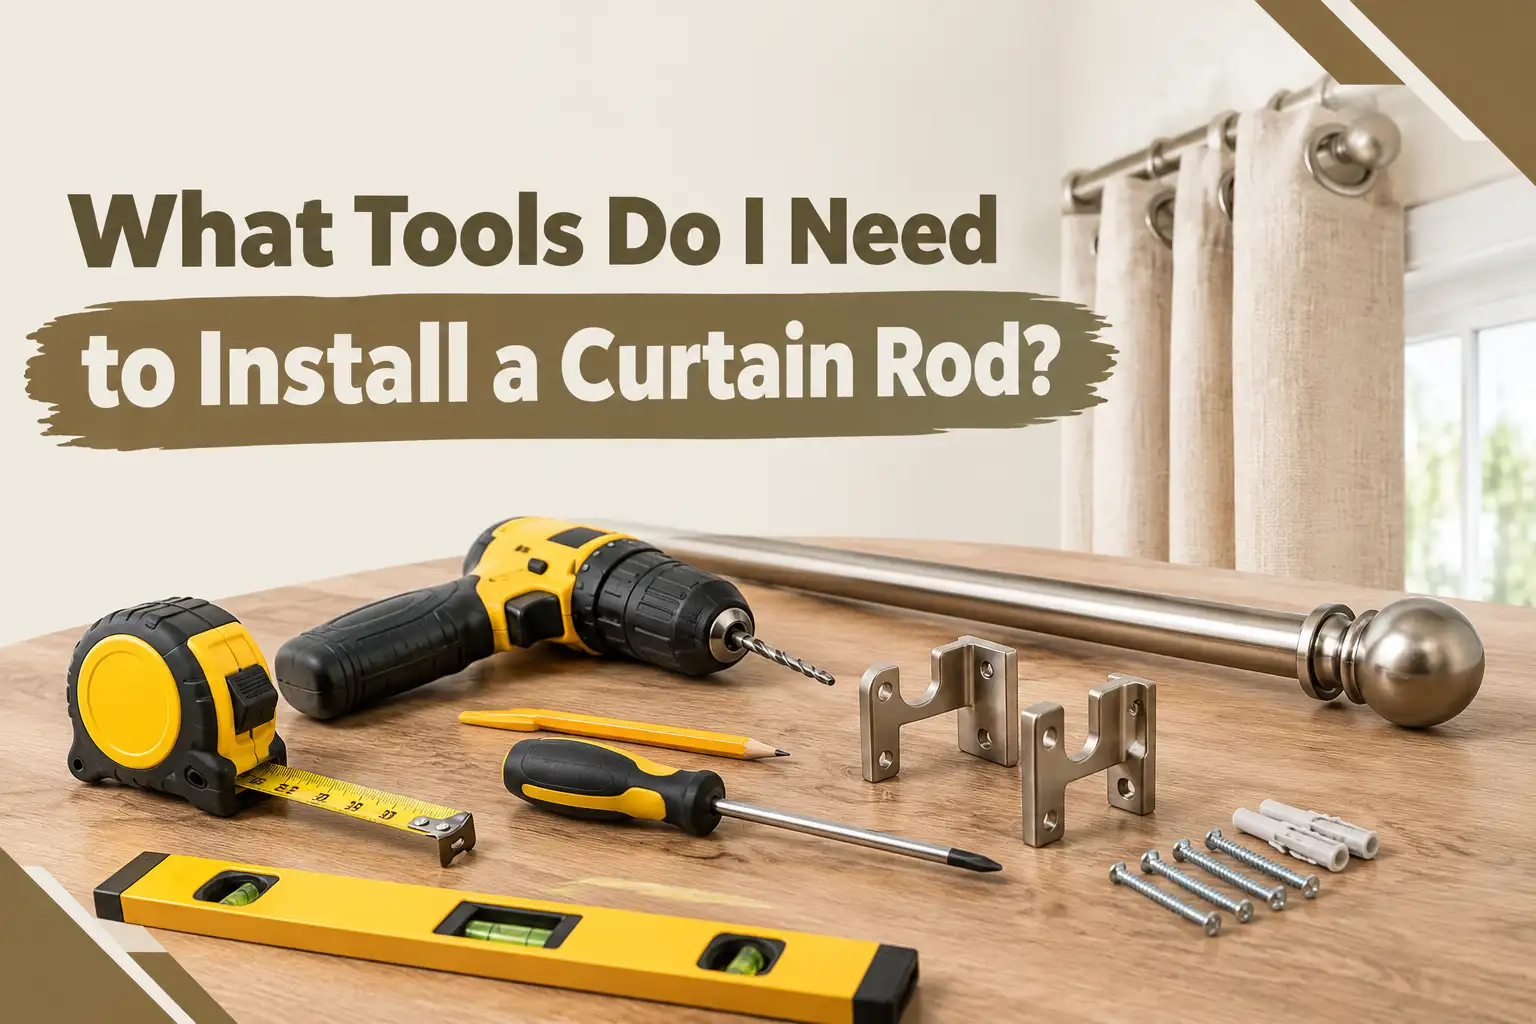
- A measuring tape
- A pencil
- A spirit level (a phone level app works if you don’t own one)
- A drill, with bits matched to your wall type
- A screwdriver
- Wall anchors or rawlplugs appropriate to your wall
- A stud finder, if you’re working on drywall or gypsum
- A stable ladder
For curtain rods with decorative finials, keep an Allen wrench nearby too, since most finials tighten with a small hex screw rather than a standard screwdriver.
I’ve seen more crooked rods caused by a missing level than by a bad drill bit. If you only buy one extra item before starting, make it the level.
How Do I Choose the Right Curtain Rod for My Window?
The rod has to match two things: the weight of your curtains and the width of your window. A standard steel or aluminium rod handles most cotton, linen, and sheer panels without issue. Heavier fabrics like velvet or lined blackout curtains need a thicker rod and reinforced brackets, or the rod will bow in the middle within a few months.
| Curtain weight | Rod type | Bracket spacing |
| Sheer, voile, lightweight cotton | Standard single rod | Wall-mounted, one bracket at each end |
| Medium fabric, linen, standard cotton | Standard or double rod | Add a centre bracket for rods over 1.8 meters |
| Velvet, blackout, lined drapes | Reinforced steel rod or track | Centre bracket mandatory, every 1 to 1.2 meters on wide windows |
| Layered sheer + drape | Double rod | Separate brackets for each rod, front and back |
If you’re deciding between a traditional rod, a track system, or something that doesn’t need drilling at all, it’s worth comparing the full range of curtain rod types and curtain track options before you buy, since the mounting hardware differs between them and switching later means drilling new holes.
Match the rod to the fabric weight before anything else. A rod that’s rated for sheers will sag under a lined velvet drape no matter how well the brackets are installed.
How High Should I Hang a Curtain Rod Above the Window?
I mount most rods 4 to 6 inches above the window frame as a default. For taller windows, or when a client wants the room to feel taller than it is, I go higher, sometimes as close to the ceiling as the wall allows. The trick works because your eye reads the height of the rod as the height of the window, not the frame underneath it.
Two things to check before you settle on a height. First, make sure there’s enough clearance above the frame for the bracket itself, since some decorative brackets need 2 to 3 inches of flat wall to sit properly. Second, if you’re hanging curtains you already own, hold the folded panel up to the wall first and check where the hem lands. Fabric has a small amount of stretch and settles once it’s hanging under its own weight, so a rod placed purely on paper measurements sometimes needs a half-inch adjustment once the curtain is actually on it.
Height changes the entire proportion of a room. Go a few inches higher than feels natural rather than mounting the rod right at the frame, and the window reads larger than it is.
How Do I Measure Curtain Rod Width Correctly?
Width is where I see the most avoidable mistakes. A rod mounted exactly at the width of the window frame means the curtains, once open, sit directly over the glass and block part of the light even when fully drawn back.
Extend the rod 4 to 10 inches beyond the window frame on each side. Narrower windows can use the smaller end of that range, and wide windows or floor-to-ceiling glass, common in Dubai apartments, look better with the full 10 inches or more. Measure the total window width first, add your chosen extension on both sides, and mark that total width with a pencil before you touch the drill. If your rod comes in fixed lengths rather than an extendable telescoping bar, buy based on this final number, not the raw window width.
Width decides how much daylight actually gets into the room. Extend the rod well past the frame, and the curtains stack fully off the glass when open instead of eating into your window space.
How Do I Install a Curtain Rod Step by Step?
This is the core process I use on a standard wall-mounted rod, from empty wall to finished install.
Step 1: Mark the Bracket Positions
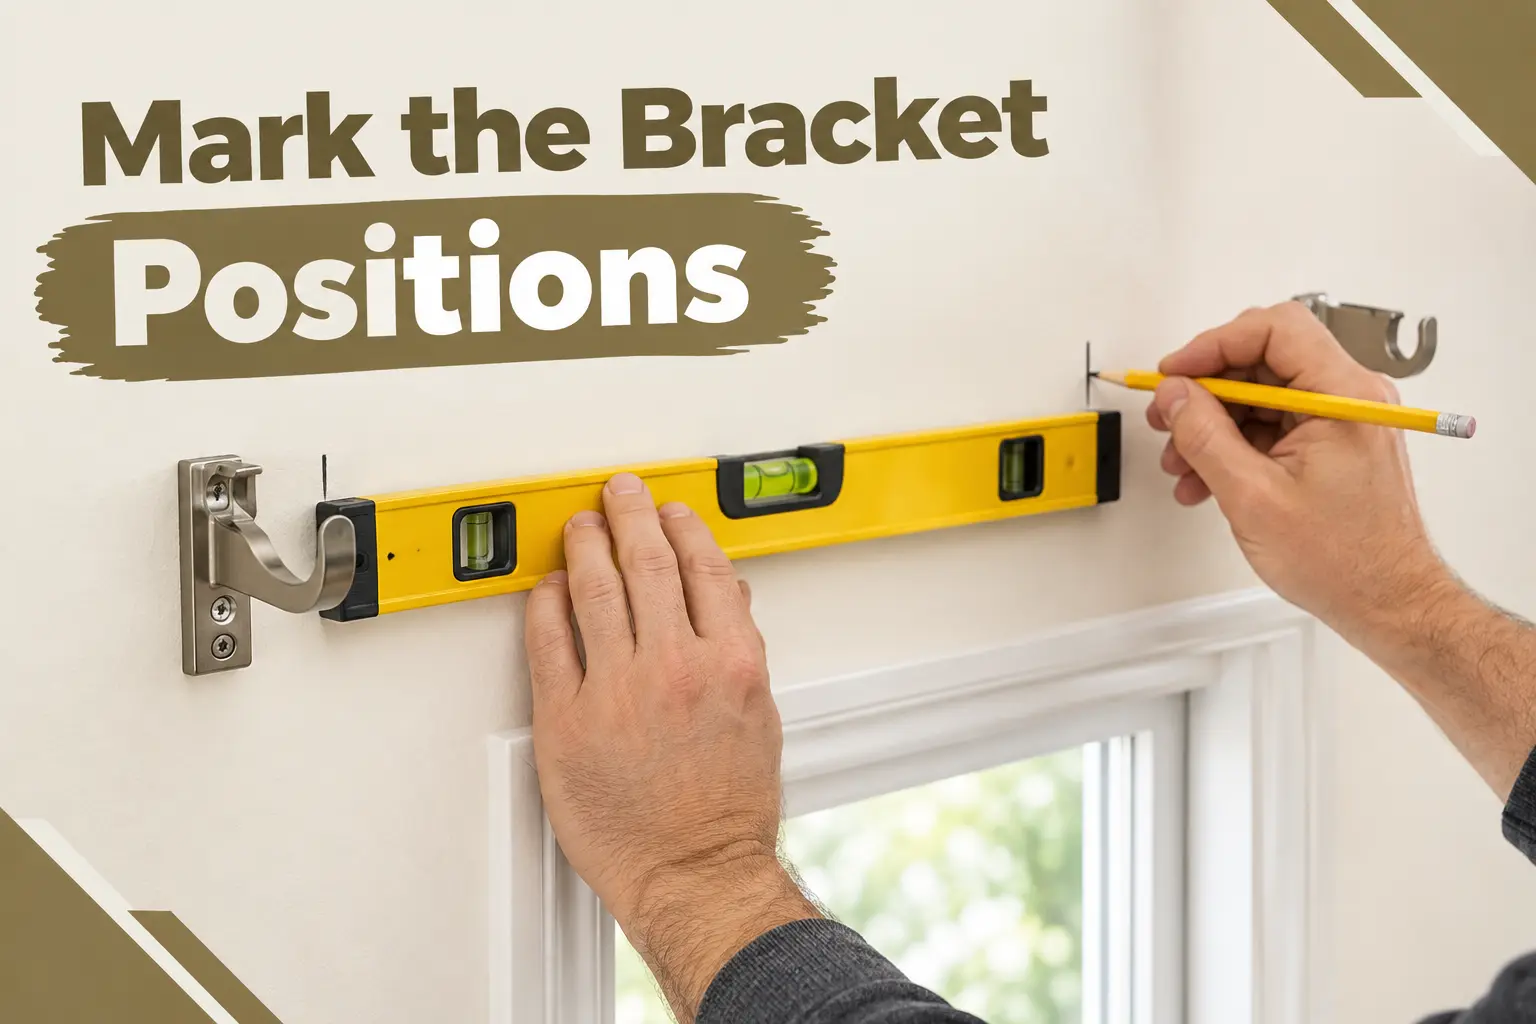
Using your height and width measurements from above, mark the exact spot for each bracket with a pencil. Use the level to confirm both marks sit on the same horizontal line, since even a small tilt becomes obvious once the rod and curtains are hanging.
Step 2: Drill the Pilot Holes
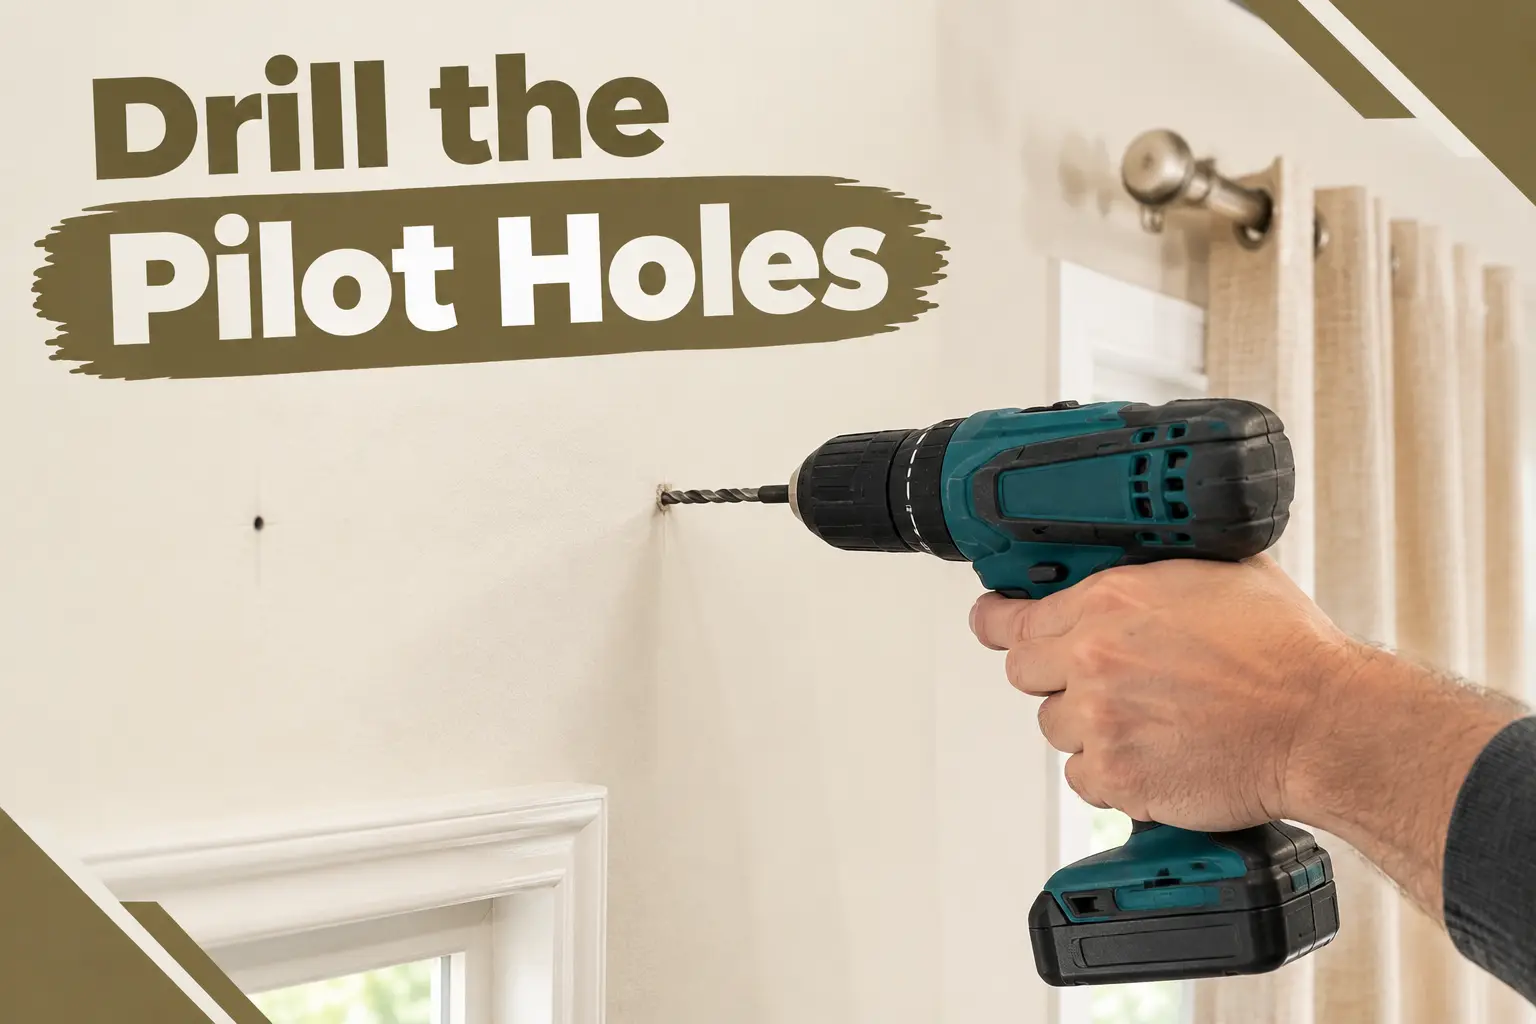
Match your drill bit to the screws or anchors you’re using. A pilot hole slightly smaller than the anchor gives a tight, secure fit. Drill straight and steady, keeping the drill perpendicular to the wall.
Step 3: Insert the Wall Anchors
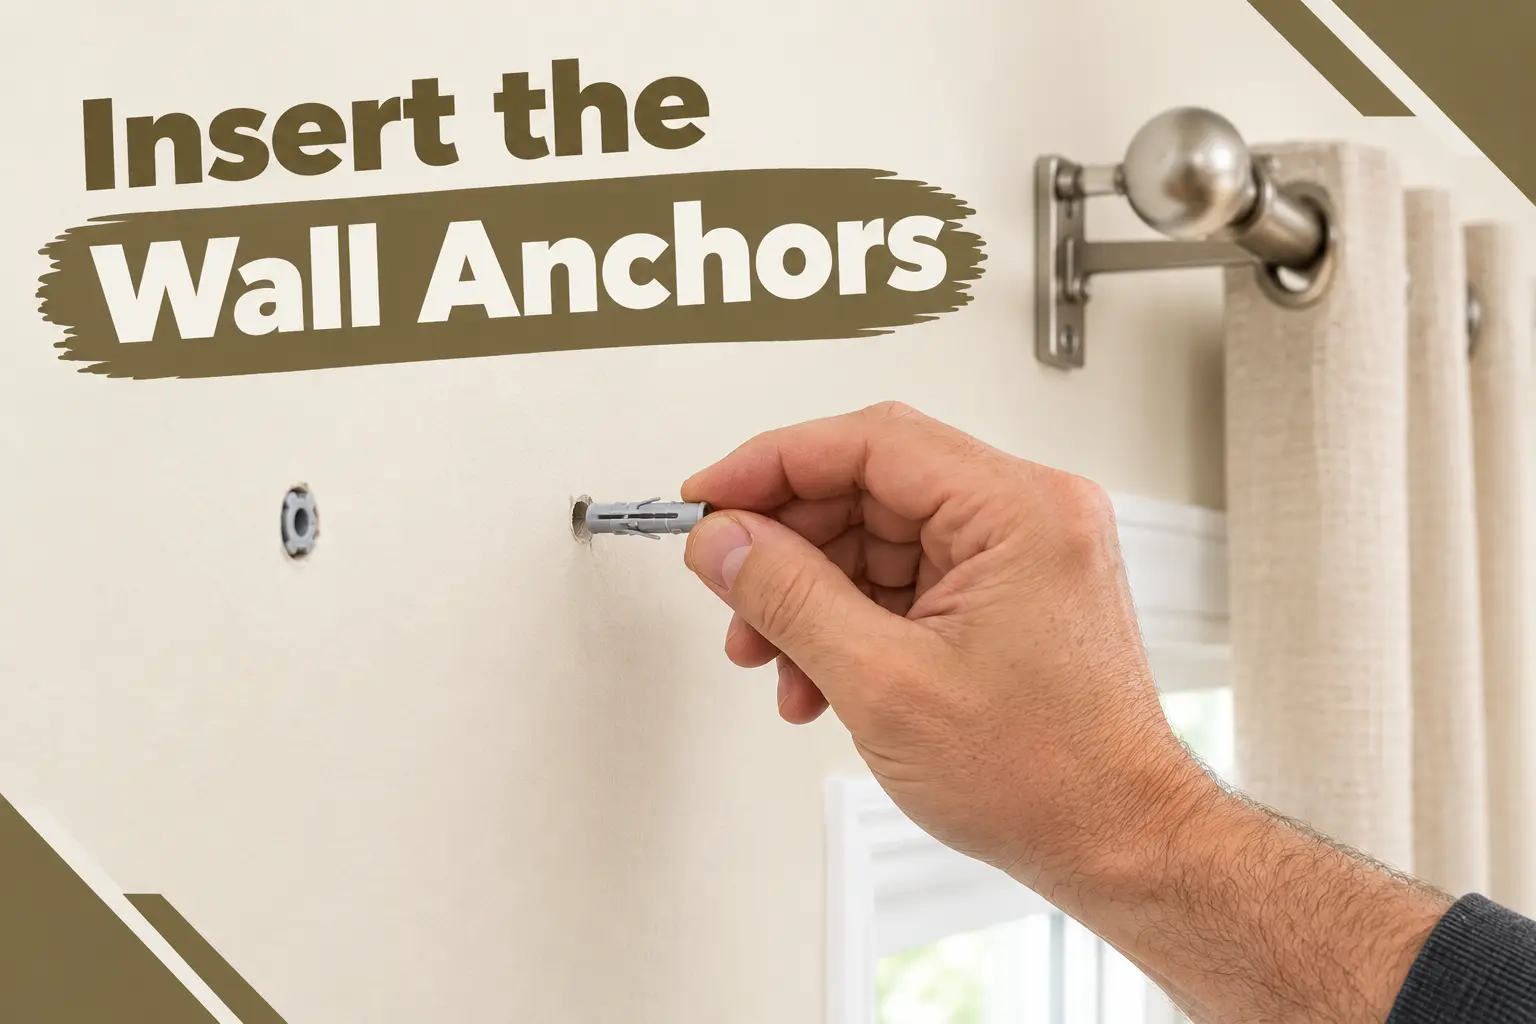
If you’re not drilling directly into a stud, insert the anchor into the pilot hole and tap it flush with the wall. The anchor is what actually carries the weight, not the screw alone, so skipping this step is the single most common reason brackets eventually pull loose.
Step 4: Screw in the Brackets
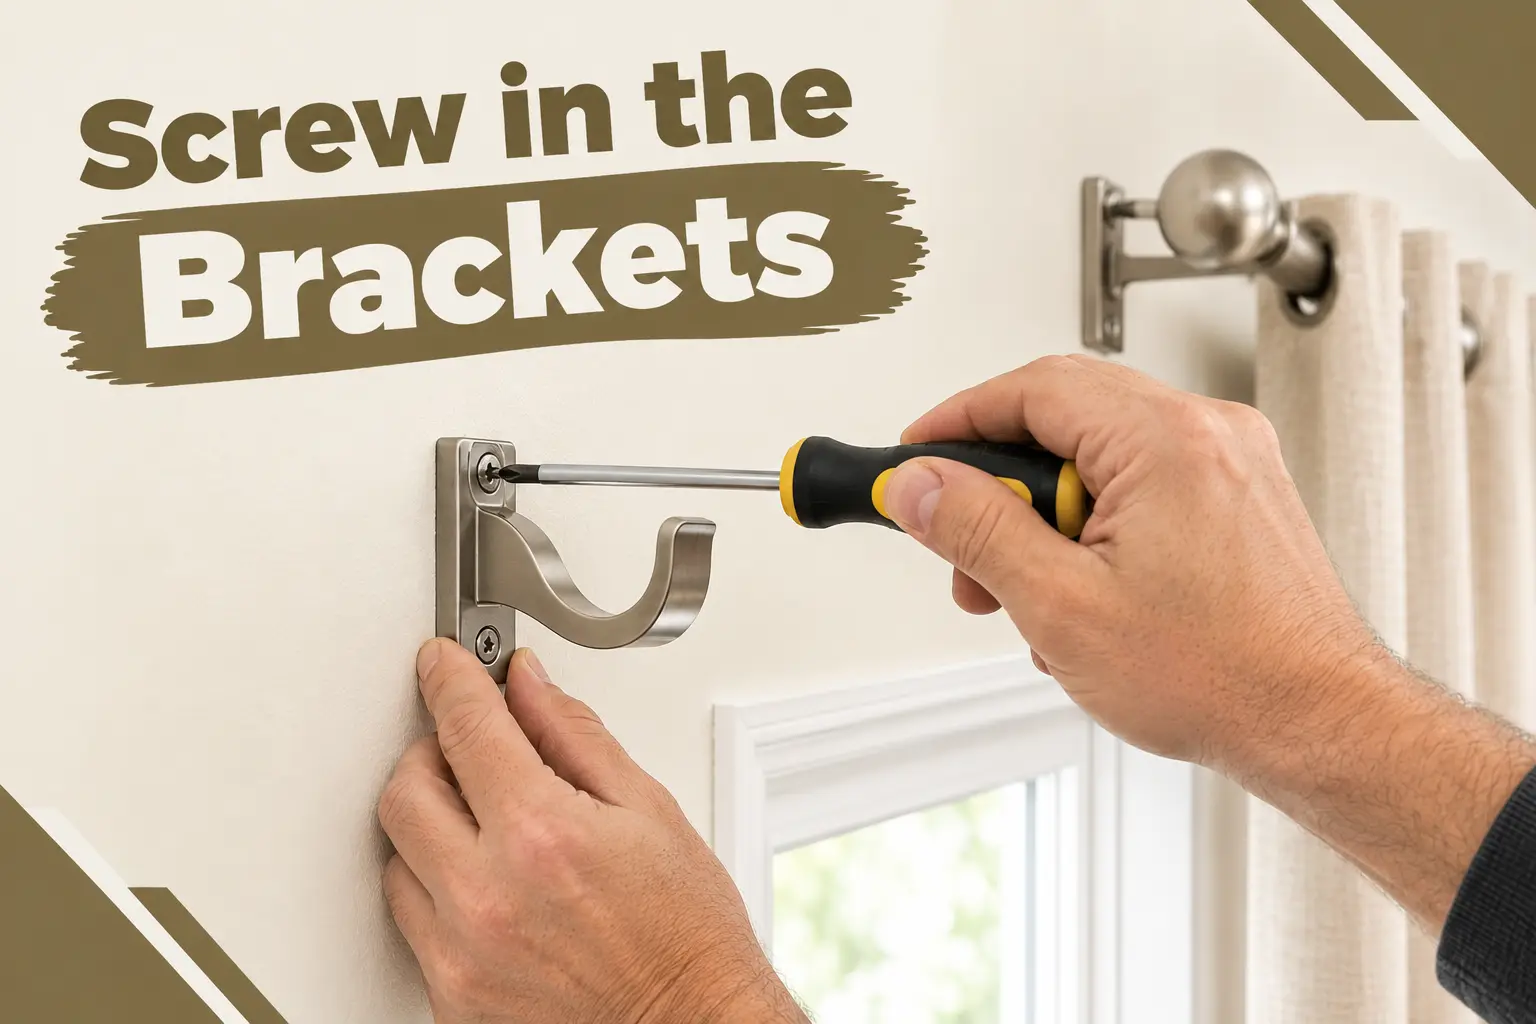
Hold the bracket over the anchor and drive the screw through it until snug. Don’t overtighten to the point of stripping the anchor. Repeat on the second mark, then check both brackets with the level one more time before moving on.
Step 5: Slide On the Curtains
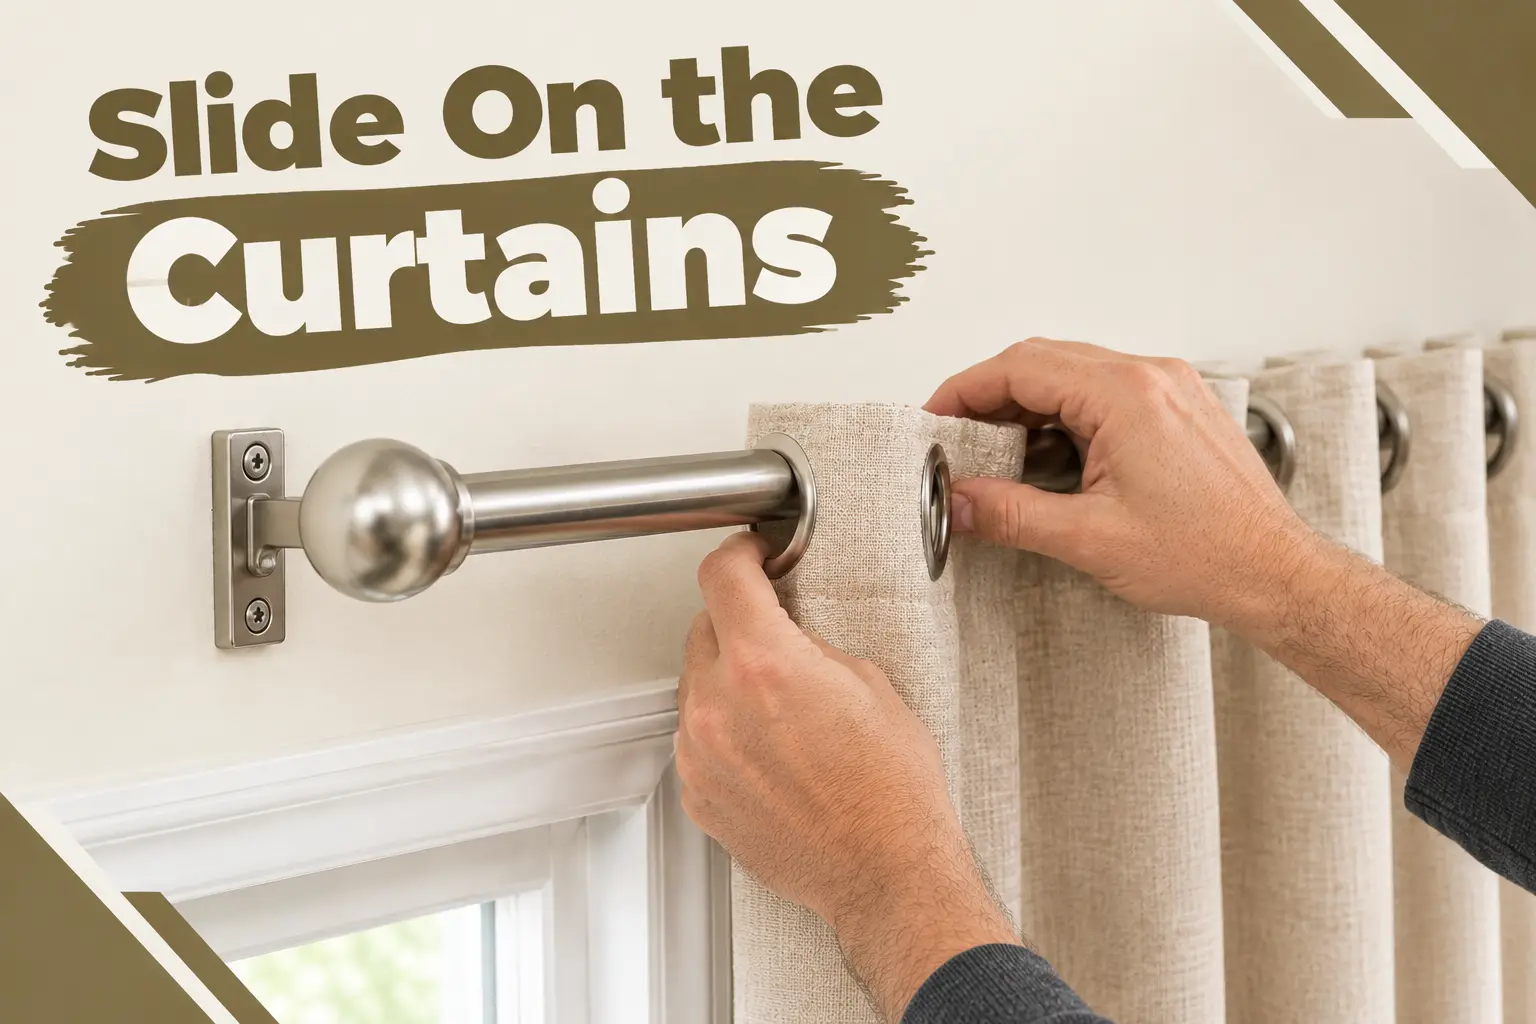
Slide your curtain panels onto the rod before mounting it, whether they use a rod pocket, rings, or clips. It’s far easier to load the fabric onto the rod while it’s on a table than to thread it onto the rod once it’s already fixed to the wall.
Step 6: Mount the Rod Onto the Brackets
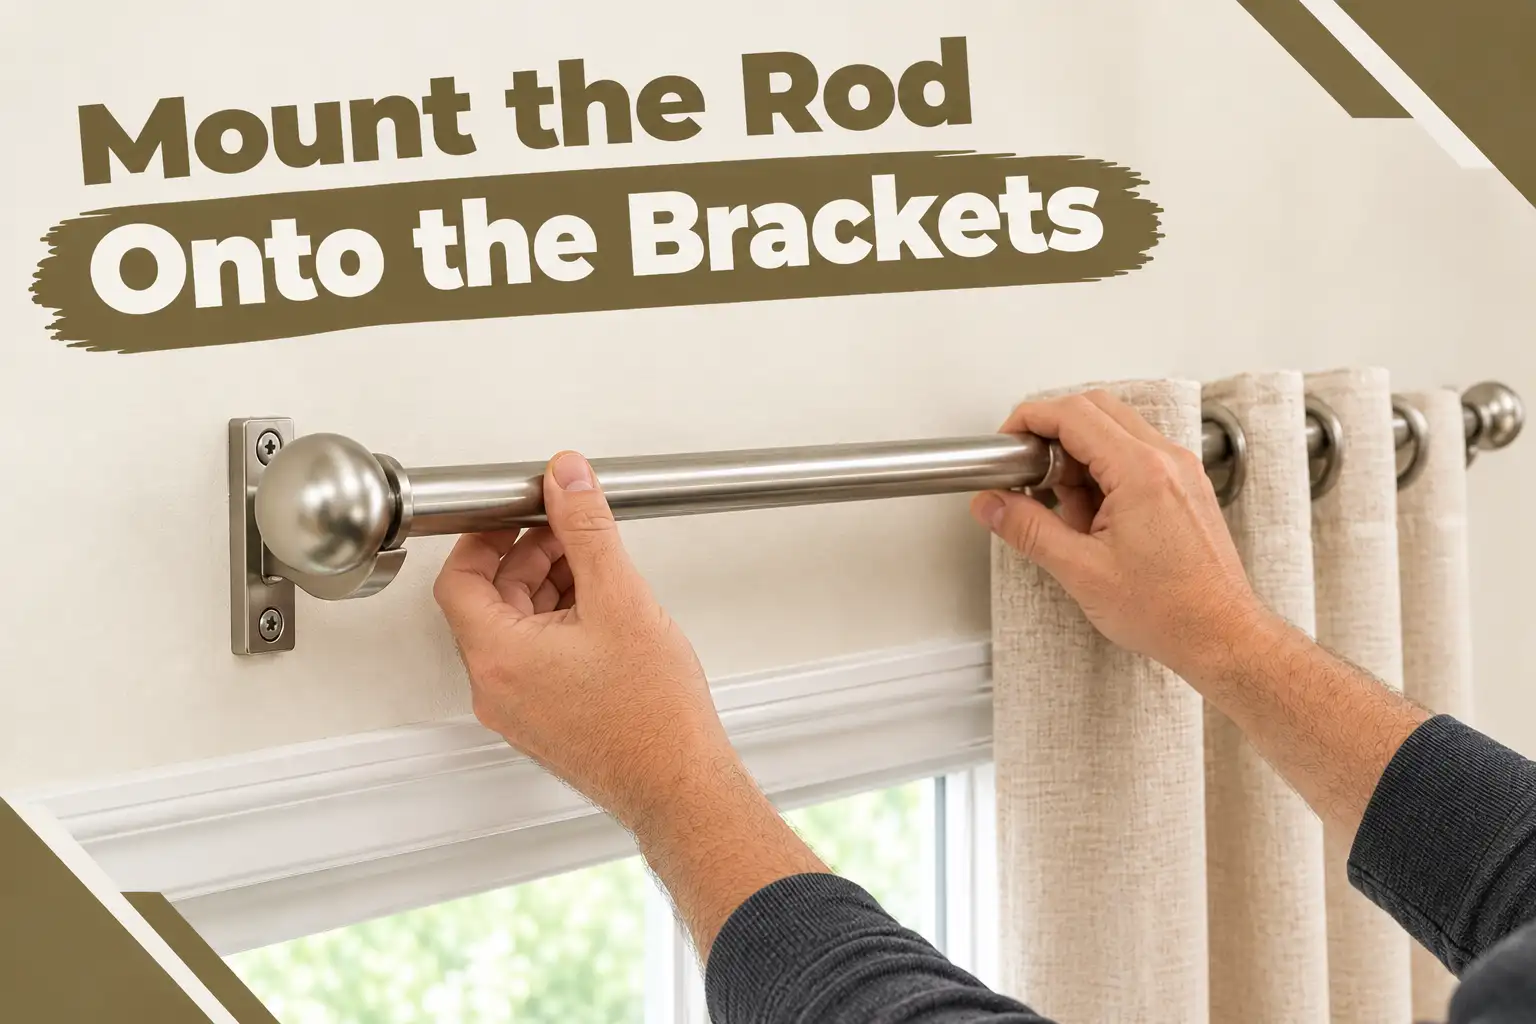
Lift the rod, curtains and all, and lower it into the installed brackets. Most brackets have a small locking mechanism, a screw or a clip, that holds the rod in place once it’s seated. Secure this now so the rod can’t be knocked off accidentally.
Step 7: Final Check
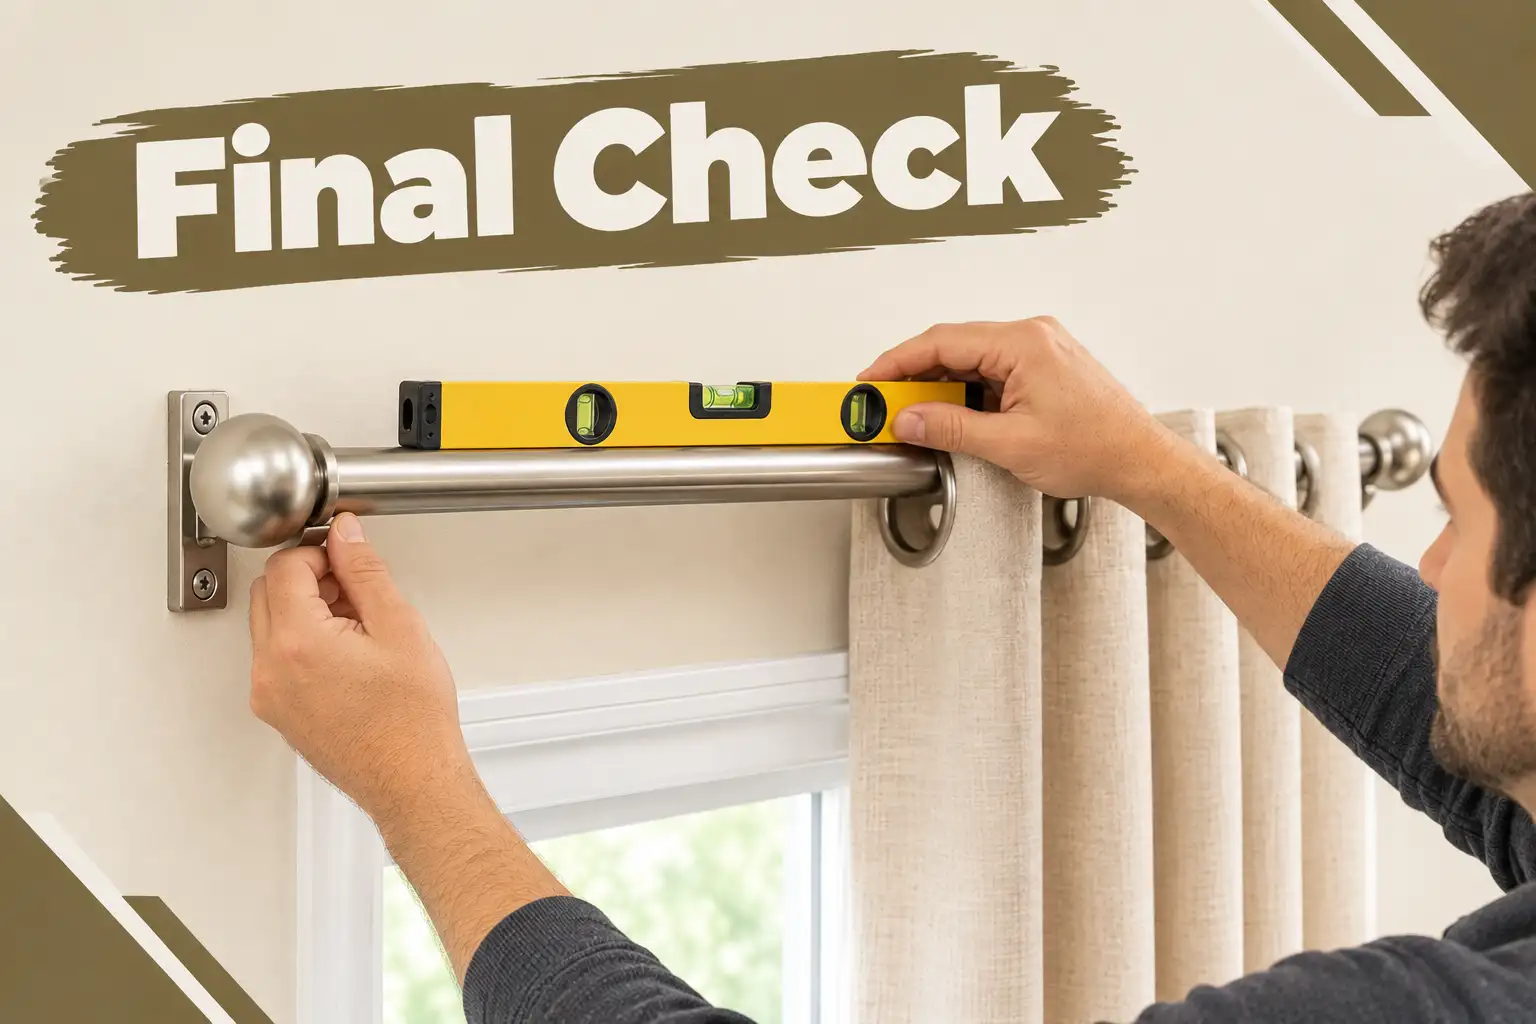
Step back and look at the whole setup from across the room. Check that the rod sits level, the curtains hang evenly, and the panels distribute across the rod without bunching at either end.
That’s the entire process in seven moves: mark, drill, anchor, bracket, load, mount, check. Most people who’ve never used a drill before finish this in 30 to 45 minutes once the wall type and hardware are sorted out.
How Do I Install a Curtain Rod on a Concrete or Gypsum Wall?
This is the part most generic guides skip entirely, and it matters most if you’re doing this in Dubai. Most homes here have concrete block walls, with gypsum board used for partition walls, false ceilings, and some interior divisions. Neither behaves like the drywall most American and European guides assume.
Installing on Concrete
Concrete is actually one of the most forgiving surfaces once you have the right bit. You need a masonry drill bit, not a standard wood or metal bit, since a regular bit will dull almost immediately against concrete and won’t cut a clean hole. Drill the pilot hole at low to medium speed to avoid cracking the surrounding surface, insert a plastic wall plug (commonly called a rawlplug) sized to match your screw, and drive the screw through the bracket into the plug. A properly plugged concrete wall holds heavy curtains, including lined velvet drapes, without any real concern.
Installing on Gypsum Board
Gypsum needs a different approach, because the board itself isn’t strong enough to hold a heavy load without extra support. Find the metal stud behind the board with a stud finder and screw directly into it wherever possible, since a screw into steel framing holds significantly more weight than a screw into the gypsum sheet alone. Where there’s no stud in the right spot, use toggle anchors or cavity anchors rated for the load of your curtains rather than a basic plastic anchor, which will pull straight through gypsum under sustained weight.
Installing on Tile
For bathroom windows or shower surrounds, drilling into tile needs a tile or glass-and-tile bit to avoid cracking the glaze. Start the hole at an angle to score the surface, then straighten the drill once the bit has bitten in. Go slowly, since tile cracks from too much pressure far more easily than concrete or gypsum does.
| Wall type | Bit needed | Anchor type |
| Concrete block | Masonry bit | Plastic wall plug (rawlplug) |
| Gypsum board (no stud) | Standard bit | Toggle or cavity anchor, load-rated |
| Gypsum board (stud present) | Standard bit | Screw directly into steel stud, no anchor needed |
| Bathroom tile | Tile or glass-and-tile bit | Wall plug matched to tile thickness |
If you take one thing from this section: don’t assume your wall is drywall just because that’s what most online guides describe. Identify whether you’re dealing with concrete, gypsum, or tile first, and choose the bit and anchor for that specific surface.
Can I Install a Curtain Rod Without Drilling?
Yes, and it’s a genuinely good option in rental apartments where drilling isn’t allowed, or for anyone who wants a temporary setup. Three approaches work well without a single hole in the wall.
- Tension rods create pressure between two surfaces, typically inside a window recess, and hold lightweight to medium curtains without any hardware. They’re the simplest option and take minutes to fit, but heavier fabrics can cause them to slip over time.
- Adhesive hooks have improved significantly in recent years, and quality options can now support a curtain rod when applied correctly to a clean, dry surface. Allow the recommended setting time before hanging any weight on them, and note that UAE heat and humidity tend to weaken adhesive bonds faster than in cooler climates, so these work best as a shorter-term solution rather than a permanent fixture.
- Magnetic rods work only on metal window frames or surfaces, but where that applies, they’re quick to fit and leave no marks at all.
For a full comparison of every no-drill method, including clip-on brackets and freestanding frames, I’ve covered the options in more depth in how to hang curtains without a rod.
No-drill methods trade some long-term stability for zero wall damage. They’re the right call for a rental or a temporary setup, and the wrong call for heavy drapes you plan to leave up for years.
What’s Different About Installing a Curtain Rod in a Bathroom?
Bathroom installations follow a different logic than the rest of the house, mainly because of moisture and the type of curtain involved.
For a shower curtain specifically, I almost always recommend a tension rod rather than a drilled installation. It avoids putting holes in tile; it’s simple to remove for washing the curtain, and it’s quick to swap out entirely when the curtain wears out, or you want a new style. If you’re dealing with buildup on the curtain itself rather than the hardware, that’s a separate problem with its own set of fixes.
For a bathroom window curtain, rather than a shower curtain, choose a moisture-resistant rod. Aluminium or stainless steel holds up against the humidity a bathroom generates every day, whereas a painted finish or a wooden rod will show wear, rust spots, or warping within a year or two. If you’re drilling into tile for this installation, follow the tile-specific bit and technique described above.
Bathrooms need hardware chosen for moisture resistance first and aesthetics second. A rod that looks perfect in the shop can still fail within a year if it isn’t rated for a humid environment.
How Much Does Professional Curtain Rod Installation Cost in Dubai?
DIY installation costs nothing beyond the tools and hardware, most of which is a one-time purchase if you don’t already own a drill. Professional installation in Dubai typically runs in a fairly predictable range, though it shifts with wall type, rod type, and whether the installer is supplying the hardware.
| Job type | Typical cost (AED) |
| Single rod, concrete wall, standard hardware | 100-150 per window |
| Double rod or layered sheer + drape setup | Higher than single rod, varies by installer |
| Ceiling-mounted track or motorized system | Priced separately, typically higher due to wiring and load requirements |
| Gypsum or tile wall, non-standard anchoring | Similar to concrete, may increase slightly for extra anchor hardware |
These figures move around based on how many windows are being done at once, since most installers offer a lower per-window rate for multi-window jobs than for a single rod. If you’d rather skip the drilling altogether and want the rod, curtains, and fitting handled as one job,Fixing Expert’s curtain fixing and installation service covers exactly this across concrete, gypsum, and tile walls.
For a single standard rod on a concrete wall, expect to pay somewhere in the AED 100 to 150 range per window in Dubai. Multi-window jobs, motorized tracks, and non-standard walls shift that number, so it’s worth getting a quote against your specific setup rather than assuming a flat rate.
What Mistakes Ruin a Curtain Rod Installation?
I see the same handful of mistakes repeatedly, on both DIY jobs and, occasionally, on rushed professional ones.
- Skipping the level is the most common. A rod that’s off by even a small angle looks noticeably crooked once curtains are hanging from it, because the fabric exaggerates any tilt in the hardware underneath.
- Using the wrong anchor for the wall type comes next. A standard plastic anchor meant for concrete will pull straight through gypsum board under weight, and a screw driven directly into concrete without a plug will work loose within months.
- Mounting the rod too close to the window frame is a design mistake rather than a structural one, but it’s just as common. It blocks light even with curtains fully open and makes the window look smaller than it is.
- Guessing the width instead of measuring it leads to rods that either don’t extend far enough past the frame or, less often, look oversized for the window they’re on.
- Not checking curtain weight against rod rating causes sagging in the centre of wide rods, particularly with heavier fabrics like velvet or lined blackout curtains that weren’t accounted for when the rod was chosen.
- Every one of these mistakes traces back to skipping a measurement or a material check before drilling. None of them is hard to avoid once you know to look for them.
Which Curtain Rod Material Lasts Longest in Dubai’s Humidity?
Material matters more here than in a drier climate, and I’ve replaced enough rusted or warped rods in coastal Dubai apartments to have a clear preference. Stainless steel and aluminium both resist humidity and coastal salt air well, holding their finish for years without rusting or warping. Cheaper painted metal rods, particularly in bathrooms or apartments close to the coast, often show rust spots or paint flaking within a year. Wooden rods work fine in drier, air-conditioned interior rooms but aren’t a good fit for bathrooms or any space with regular moisture exposure.
If you’re choosing hardware for a long-term install rather than a temporary setup, stainless steel or aluminium is worth the slightly higher upfront cost over a painted finish.
When Should I Call a Professional Instead of DIY?
I’d DIY a single standard rod on a straightforward wall without hesitation, and most people can too with an hour and the right bits. Where I’d bring in a professional instead: motorized or wave curtain systems, which usually need wiring and specific load calculations; very heavy drapes on wide windows, where bracket spacing and anchor rating actually matter for safety; ceiling-mounted tracks, which involve a different mounting logic than a wall bracket; and any situation where you’re not confident identifying whether your wall is concrete, gypsum, or something else, since guessing wrong risks either a failed install or wall damage that costs more to fix than the installation would have.
If you’ve got a straightforward window and the tools listed earlier, DIY installation is genuinely within reach. For anything load-bearing, motorized, or ceiling-mounted, or if you’d simply rather not deal with drilling into concrete yourself,get in touch for a quote.
Getting the Result to Last
A correctly installed rod, on the right anchor for the wall it’s in, with brackets rated for the curtain weight on it, should hold for years without needing to be touched again. The parts of this job that actually determine whether that happens are decided before the drill ever touches the wall: identifying the wall type, measuring height and width properly, and matching the rod and anchor to the curtain you’re hanging. Get those three things right, and the drilling itself is the easy part.
Frequently Asked Questions
Do I need anchors for a curtain rod on a concrete wall in Dubai?
Yes. A concrete wall needs a masonry bit and a plastic wall plug (rawlplug) for the screw to grip. Driving a screw straight into concrete without a plug will work loose within months, especially under the weight of heavier curtains. I’ve had to redo several installs where someone skipped this step to save five minutes.
What size drill bit do I need for curtain rod brackets?
It depends on the screw and anchor you’re using, and the packaging for your specific bracket usually states the correct size. As a general rule, the pilot hole should be slightly smaller than the anchor so it grips tightly once tapped in. For concrete specifically, a 6mm masonry bit covers most standard bracket screws.
How far should a curtain rod extend beyond the window frame?
4 to 10 inches on each side, depending on the width of the window. I go toward the higher end of that range on wide or floor-to-ceiling windows, which lets the curtains stack fully off the glass when open instead of blocking part of the light.
Can one person install a curtain rod alone, or do I need help?
One person can manage a standard single-window rod without help. Wide rods over about 1.8 meters, or anything mounted high on a ladder, go faster and safer with a second person holding the rod steady while you secure it into the brackets.
How long does curtain rod installation actually take?
30 to 45 minutes for a standard single rod once you’ve got the right tools and know your wall type. Concrete takes slightly longer than gypsum because of the drilling speed needed to avoid cracking the surface. Multiple windows or a double rod setup add time proportionally.
Is it cheaper to install curtain rod myself or hire a professional in Dubai?
DIY costs less if you already own basic tools, since you’re only paying for the rod and anchors. A professional install typically runs AED 100 to 150 per window on a standard concrete wall, which covers the correct tools for the wall type, a clean finish, and the time saved. For a single straightforward window, DIY usually makes sense. For multiple windows, heavy drapes, or a wall type you’re unsure about, the professional rate often works out cheaper than a failed DIY attempt and a wall repair afterwards.