How to Install Hardwood Flooring? Beginner’s DIY Guide
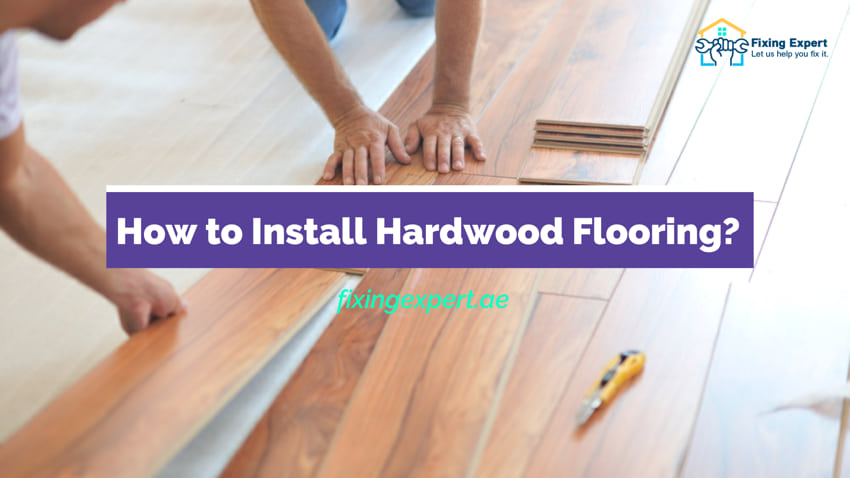
How to Install Hardwood Flooring? Beginner’s DIY Guide
When it comes to installing flooring in your home to make it more appealing, the majority of people go for hardwood flooring. Because of its texture, it has a classic and beautiful appearance while also making the entire space more comfortable.
Wood parquet flooring is the preferred option for anyone who enjoys incorporating ornamental elements into their most prized home area from time to time. Despite the fact that it is costly, it manages to get put in the first place.
However, here is an often asked question that almost everyone has: how to install hardwood flooring. With that stated, let me tell you that installing it is not a simple task. For a flawless installation, you’ll need to contact professionals. Because you spent a lot of money on the flooring, you may want it to be correctly installed at your home.
Spend some money on hiring professionals to help you make your house more appealing. However, if you still want to do it yourself to save money, this guide will walk you through the process of installing this professionally constructed hardwood flooring.
Steps Regarding the Perfect Installation of Hardwood Flooring At Your Precious Place
Despite the fact that wood flooring is costly, it provides your area with a beautiful appeal in the most perfect way. In addition, you will have to pay for the services of a professional. However, you may save it by carefully following the instructions outlined below.
So that any or all areas of your precious home may be given a fresh new look with such a sophisticated floor covering. These processes are difficult, but if you put in the time and effort, you can create an appealing living area with a friendly ambiance.
Get Yourself Prepared With the Necessary Equipment
First and foremost, you must prepare yourself before beginning the installation process of professionally designed hardwood flooring at your home in order to make it appear more attractive.
Make sure you have everything you’ll need for the flooring installation so you don’t become irritated because you’re missing something. A drilling machine, drill bits, flooring nailer, hammer, nails, floor molding, and flooring accessories may be required. After you have all of these items, you may begin the installation procedure.
This is the time to Get the Floor Prepared to Install Hardwood Flooring
When you’ve gathered everything you’ll need for the installation, it’s time to prepare your floor so that these hardwood flooring planks can be installed without difficulty. It is vital to level and smoothes your subfloor before installing your hardwood flooring.
Otherwise, the installation will not proceed easily, and your room will not have a pleasing appearance. This may be accomplished by sanding the subflooring, sealing all seams and gaps, and leveling the flooring.
You May Need To Know: Best Low Cost Alternative of Hardwood Flooring
Now, Install the First Row of Hardwood Flooring Planks
Begin the installation procedure when the subfloor has been sufficiently leveled. Install the first row by lining up the tongue side of the boards with the room’s centre. Place a spacer between the planks and the wall while installing them to ensure that there is a gap between them and the wall. The distance between the two points should be around 12 inches.
This area will allow the wood planks to expand as a result of heat and humidity, filling in the gap after installation. Pre-drill the nail holes about 14 inches into the boards from the narrow side and 12 inches from the wall for a stable installation. Pre-drill these holes at approximately 6-inch intervals throughout the entire length of each board.
Make sure to Get the Nails Countersunk For the Secure Installation
After you’ve finished pre-drilling the nail holes, use a nail punch to countersink the nails. Fill the nail holes with the appropriate putty now. After that, you must blind-nail through the tongue of the board at a 45-degree angle.
Make sure the nails are completely countersunk so they don’t get in the way of the board-to-board connection. Installing procedure on solid and engineered wood is almost same.
Now, Use the Fit And Lock Methods On the Boards
Install the second row once the first row has been securely placed. Make careful to use a mallet to secure the tongue and groove of the boards together when putting down the second row. Block for a snug fit between the boards as well. Additionally, trim the end boards down to make a more durable and appealing flooring pattern.
Install the Last Rows And Finish The Installation Process
Start hand-nailing the remaining rows once you’ve reached the end of the installation. Cut the planks to fit and measure the distance from the wall to the board while putting the final row of planks.
Check to see that the last piece is 1-inch wide or smaller, then glue it in place using a little quantity of adhesive.
Insert that final component with the pry bar to safeguard the wall. If the item is bigger than 1-inch, face-nail it, countersink the nails and fill up the holes with matching putty.
Let’s Clear Up the Mess And Allow The Place To Look Adorable
Install the shoe moldings and baseboards to complete the look. Remove all of the debris that accumulated during the installation. After that, vacuum the floor to give it a nice and clean appearance. As a result, your living space will have a more appealing appearance thanks to the allure of a newly fitted exquisite floor covering.
To Sum Up
I will advocate employing expert services for the correct installation of hardwood flooring at your home at the conclusion of this post. However, if you want to give it a try on your own, then carefully follow the above-mentioned instructions to ensure that your wonderfully designed house flooring is correctly installed and that your most prized home area is transformed into a welcoming environment.
Read more.