How To Make Designer Metallic Epoxy Floors? Step By Step Tutorial
Designer metallic epoxy floors have become increasingly popular in recent years, as they offer a unique and stylish look that can add a touch of luxury to any home. But what are they really, and how are they produced?
A transparent epoxy resin and a metallic pigment are used to create designer metallic epoxy flooring. This results in a flooring material that is attractive and fashionable in addition to being sturdy and long-lasting. The clear epoxy resin used in these floors is often UV-resistant, making them ideal for use in both indoor and outdoor spaces.
The process of making these floors is actually quite simple. First, the clear epoxy resin is mixed with the metallic pigment. The liquid is mixed, then poured, and distributed uniformly over the floor.
Steps For How To Make Designer Metallic Epoxy Floors
Designer metallic epoxy floors are a type of decorative flooring that uses a specialized epoxy resin to create a dazzling, multi-colored finish. Although it may be utilized in private residences, this kind of flooring is frequently employed in business and industrial environments. Metallic epoxy flooring is a great option for high-traffic areas since they are incredibly resilient and simple to maintain.
If you’re interested in creating a designer metallic epoxy floor in your home, there are a few things you need to know. In this article, we’ll give you a step-by-step guide on how to create a beautiful metallic epoxy floor in your home.
Step 1: Mixing And Applying Primer
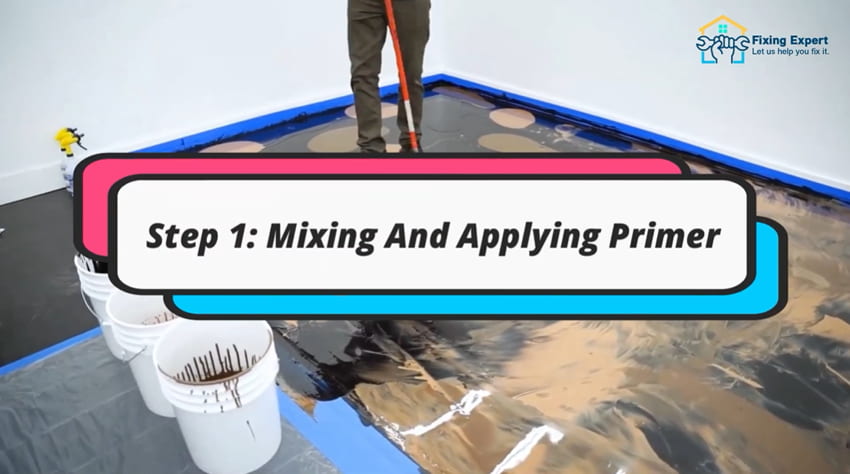
The first stage in this procedure is to tape off any edges on your floor so that you may operate in a clean environment. After that, you may start mixing your primer. Before mixing your primer, make sure your floor is ready and taped off because you’ll want to start applying it right away.
We applied our primer with a painter’s tray and a paint roller. The roller is ideal for spreading a uniform coat of paint across your whole floor. You must equally prime the whole floor. This stage will go more smoothly and fast if you use these materials.
Step 2: Mixing Epoxy
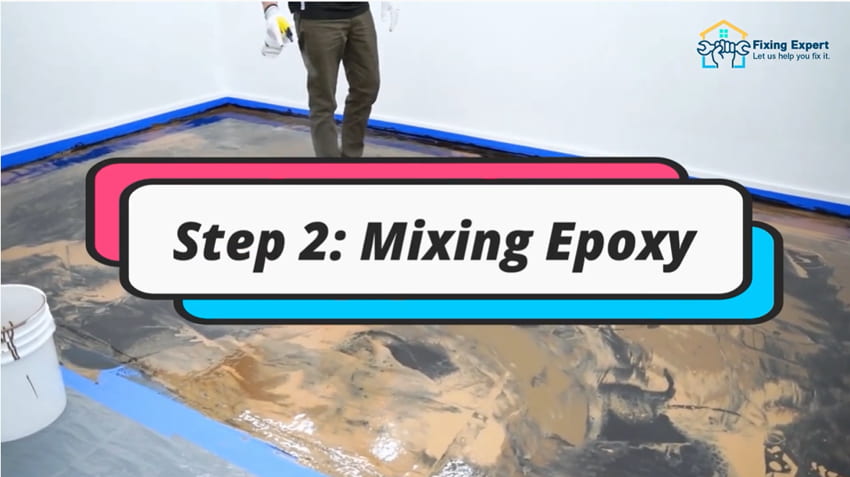
Remember, before you start mixing your Epoxy, make sure you’ve accomplished all of the preceding procedures. After you’ve mixed the epoxy, don’t let it rest in the buckets for too long before pouring it. On this floor, we utilized Leggari Pigments in three different hues.
We combined all of our epoxies first to save time, then separated them into three buckets to mix the colored pigments in each. You, too, will be able to consolidate your epoxy mixture if you have the appropriate amount of product according to your square footage.
Step 3: Applying Epoxy
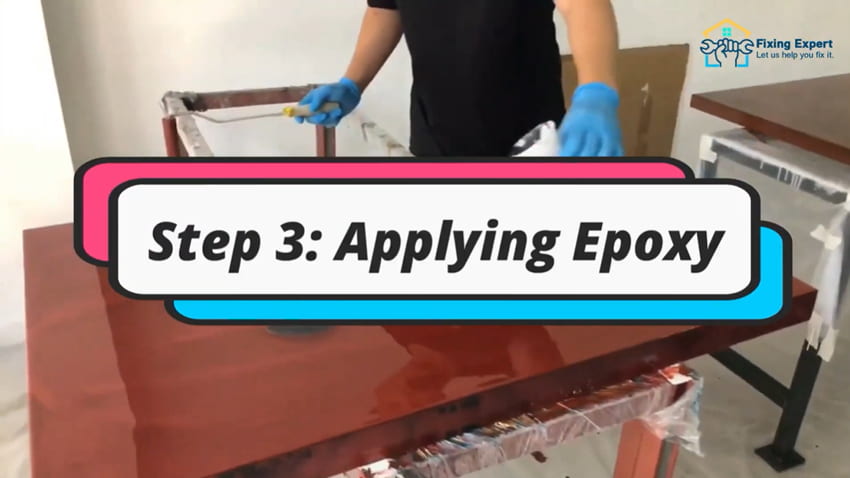
Pour all of the base coat onto the floor to begin this phase. Use a squeegee to finish, as seen in the first image. Begin by spreading the base coat evenly across the whole floor.
It’s critical to apply an epoxy base coat to your surface before moving on to the next stage. After that, we rolled over the whole floor with a paint roller. This allows your staff to be distributed evenly around the floor.
Step 4: Blending Epoxy
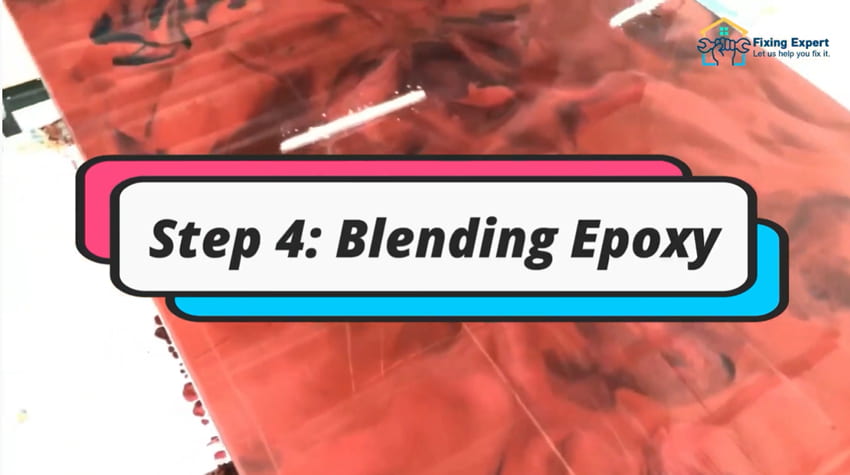
We utilized a Leggari Flat squeegee for this procedure. The flat squeegee is intended to apply 30 square feet of paint to each gallon, which is exactly what we accomplished with this approach.
When mixing the epoxy, be sure to keep the squeegee at an angle and not press down too hard, since you don’t want to move the resin too much, just enough to blend the colors and create your epoxy design.
Step 5: Dispersing Effects & Denatured Alcohol
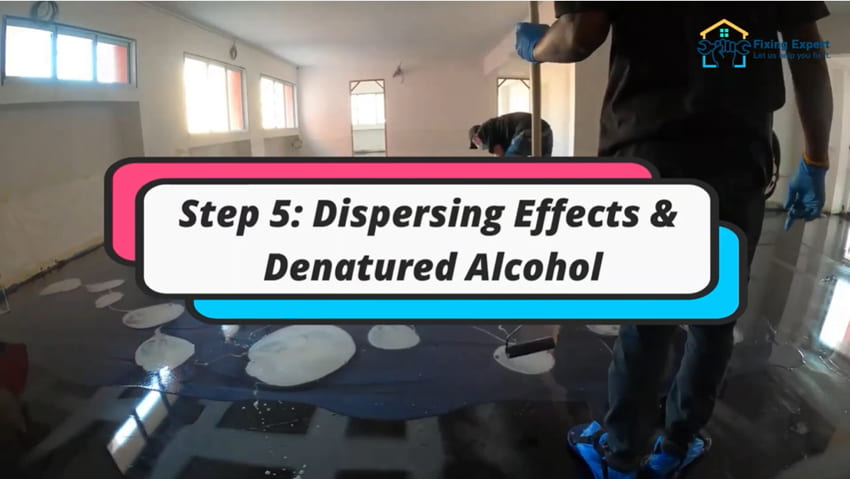
We were ready to spray on the isopropyl alcohol after we had the floor laid out and were comfortable with the pattern; we always made sure it was at least 91 percent alcohol. This should be sprayed all over your floor.
This will aid you in locating those cells as well as dispersing effects across your floor. After about 5 minutes, we spritz the denatured alcohol onto the pattern to harden it after it has evaporated.
To Wrap Up!
Designer metallic epoxy floors have become more and more popular in recent years as homeowners search for distinctive and fashionable ways to renovate their houses. These floors are created by combining epoxy with metal pigments to create a shimmering, metallic effect that is sure to turn heads.
Metallic epoxy floors are a type of flooring that is made with a special epoxy resin. This material can be used to create a variety of designs, including floors that resemble marble or other types of stone.
If you are interested in creating a metallic epoxy floor for your home or business, this article is for you, we have mentioned a step-by-step guide on how to make a metallic epoxy floor.
Read more.